Posts filed under ‘For the little wonders’
Kickstarting the festivities with Scandinavian Rosettes and Timbales!
Airy, delicate, melt in your mouth- these deep fried Scandinavian Rosettes and Timbales are a delight to make and eat! Christmas is just around the corner and what better way to kickstart the festivities than these gorgeous, intricately designed cookies & pastry shells which are traditionally made during Christmas!

I have been hoarding these special Rosette and Timbale irons/moulds for many many years now. I found them in a hole-in-the –wall shop in Tulshibaugh, Pune (of all the places). I just bought them on a whim, not knowing what they were used for. They made it to my ‘To be used immediately’ list when I found them during one of my recent cleaning sprees.
For the basic pastry,most of the recipes online use the same proportion of Flour,egg and Milk more or less and the batter can be whisked together quickly. I added an extra tablespoon of sugar for the sweet lovers in my house (except me) and a pinch of baking powder (I may skip this next time).

Moulding and deep frying the cookies is a bit tricky and needs some practice as well as patience, if you are a novice. The iron is heated at a high temperature in hot oil, then dipped in the batter so that the batter sticks to it and then re-immersed in the hot oil to create a crisp pastry layer around the iron which can then be taken off with the help of a fork. Just reading this might seem intimidating, but it was easier once I got a hang of it. The Timbales were trickier to take off the iron and to ensure they were fried evenly..
The fried cookies and pastry shells are dusted with Icing sugar to make them sweeter as well as to give them a festive look.

Achapam, the traditional cookies from Kerala are on my list next. They are very similar to the Rosettes but are made using Rice flour.
The Timbales were served filled with fresh fruits. You may also fill them with custard.
Indulge in this pretty deep fried goodness this festive season, here’s how I made them:
Scandinavian Rosettes and Timbales
Servings: I made around 15 Rosettes and 10 assorted Timbales
Ingredients
1 Cup Flour
1 Cup Milk
2 eggs
2 tbsp sugar
¼ tsp baking powder (optional)
½ tsp Vanilla or Almond Extract
Large pinch salt
Any Flavorless oil for deep frying (I used Sunflower)
Icing sugar for dusting
Method
Heat oil in a pan deep enough to fry the cookies.
In a mixing bowl sift the flour. Add the milk, eggs, sugar, extract, salt and Baking powder. Whisk together till all the lumps disappear. (Do not over mix)
Carefully dip the iron in the hot oil for 2-3 minutes. Drain the oil and immediately immerse the iron in the batter just upto the top egde for a few seconds. (You will hear a sizzling sound if the iron is hot enough, once you dip it in the batter) If the batter is over the top, it will be difficult to remove the cookies.
Immerse the iron back in the oil and fry on medium heat, till the cookies are light brown (evenly) in colour. Use a fork to gently push them out of the mould.
Use a slotted spoon to fishout, if the cookies fall off in the hot oil.
Drain them on a paper towel and dust with Icing sugar.
Note: Rosettes as well as the Timbales are best eaten within 1-2 days or being made. To store, keep them layered between sheets of waxed paper in an airtight container preferably in a cooler part of the house.
Share this:

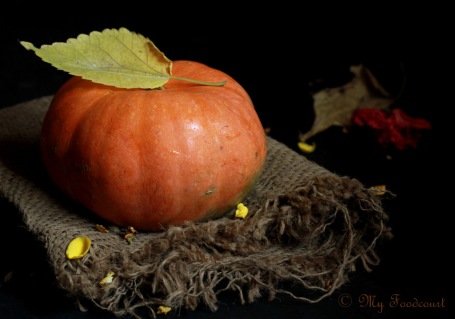
Spiced Pumpkin Bread Rolls – We knead to bake
This is one of the most adorable breads I have baked! These supersoft , flavourful,festive Spiced Pumpkin Bread rolls are just in time for Thanksgiving- whether you celebrate or not 🙂

Aparna aptly chose these for the our monthly bread baking group-We knead to Bake. Thank you Aparna, I had so much fun making them. As gorgeous as they look, they are quiet easy to make.
Apart from looking like mini pumpkins, these rolls use Pumpkin puree too. I followed Aparna’s recipe without making any changes.I made my own pumpkin puree, since canned is not available here. Also I used pumpkin pie spice mix to flavour the rolls, instead of the individual spices. The kitchen smelled heavenly, while the rolls were being baked 🙂
This recipe for the Spiced Pumpkin Bread Rolls is adapted from Beyond Kimchee.I used only the 2 tbsp honey, recommended by Aparna so they were not sweet.

Spiced Pumpkin Bread Rolls
(Adapted from Beyond Kimchee)
Ingredients:
1/3 cup warm milk
2 tbsp honey
2 tsp instant yeast
1/2 cup puréed pumpkin (unsweetened)
40gm butter, melted
1 egg
1 teaspoon salt
2 1/2 to 2 3/4 cups all-purpose flour
1/2 tsp cinnamon
1 tsp powdered dry ginger
1/2 tsp allspice
5 to 6 pecans, sliced into 3 vertical sections
Method:
Pour the warm milk into a bowl. Add the honey and yeast and mix well and leave aside for about 5 minutes until the mixture is starting to look “frothy”.
Put the flour, the salt and the spice powders into a food processor or stand mixer bowl and run a couple of times to mix them well. Then add the yeast mixture, the pumpkin purée, the melted butter and the egg to the processor bowl.
Knead until you have a smooth and elastic dough that will be somewhat sticky. It should pull from the side of the bowl. Add a little more flour (or milk) if required, to obtain this consistency of dough.
Turn the dough out to a wooden board dusted with a little flour and knead by hand for a minute or if using a stand mixer continue to knead on medium speed.
Shape it into a ball and place it in a well-oiled bowl, turning it around to coat it well. Loosely cover and let the dough rise for about an hour or so, until double in volume.
Deflate the risen dough gently to remove large pockets of air and divide it into about 8 or 10 equal sized portions. Shape each portion into a ball. Flatten each ball slightly and using a sharp knife or a pair of scissors make 7-8 cuts at equal distance from each other, from the edge of the ball towards the centre but leaving the centre uncut – like a flower.
Place the dough “flowers” 2” apart on a lightly oiled or parchment lined baking sheet. Loosely cover and let them rise for about 45 minutes. Use your fore finger or the round end of a wooden spoon (dip it in a little oil or flour so the dough doesn’t stick to it) and poke a deep hole in the centre of each “flower” for the pecan “stem”. Brush them with milk (or egg wash if you use it).
Bake the rolls at 180C (350F) for 15 to 20 minutes, or until golden brown. Take them out of the oven and brush the rolls with melted butter or a little honey diluted with water for a shine, if you like that.
Let them cool and then place a sliced pecan piece for the “stem”into the indentation of each roll.
I served them with a hot soup.
Share this:

Happy Diwali! and a recipe for Fresh Figs with Lychee Honey – Nut Shrikhand
If you are looking to prepare some non-traditional, quick dessert this Diwali, here’s a refreshing guilt free dessert; Figs with Lychee Honey -Nut Shrikhand.
Dulche de leche & Apple Satori
A can of Homemade Dulche de leche lurking in the fridge got me thinking about this Satori.
Satori is a Maharashtrian sweet flat bread, usually stuffed with Rava and Khoya/Mawa .The stuffed bread is then cooked on a griddle ,drizzled with homemade ghee.
I decided to swap the Dulche de leche for khoya. It’s the season of Apples and Apple pies, so some grated apples and spices were added to the filling. I love the McCormick Apple pie spice mix I bought a few years ago. The warm spices mingled well with the Apple and Dulche De leche stuffing. I made a small test batch of about 7-8 Satoris and they were gone in minutes. I think grated pumpkin should also work in place of Apples.
The Dulche de leche I used was very firm since it was sitting in my refrigerator for quite some time. A filling made with a runny or a sauce like consistency of Dulche de Leche may not be a good idea, since it will be difficult to stuff and roll out the Satori.Take care that it is firm enough.

If you would like to try something different this Diwali, here’s my fusion recipe for
Dulche de Leche & Apple Satori
Ingredients
For the cover
¾ cup Maida
¾ cup fine Rava (Semolina)
Small pinch salt
½ tbsp oil
~1/2 cup water (or more if required)
For the filling
2-3 tbsp Ghee
4 tbsp fine Rava/Semolina
2 Apples,peeled cored and grated (I used 1 Granny Smith and 1 Red Shimla apple)
3-4 tbsp Homemade Dulche de leche
½ tsp Apple pie spice mix (or you can use Cinnamon, Nutmeg, All Spice powder)
Ghee to cook the Satori
Method
For the dough
Boil water with the oil. Cool .
Mix the Maida, Rava and salt in a bowl.
Gradually add the water till it all just comes together.
Knead into a soft pliable dough.
Cover with a kitchen towel and keep aside for half an hour.
To make the filling
Heat the ghee in a pan.
Add the Rava and roast for 2-3 minutes .
Add the grated apples and mix nicely. Add 1-2 tbsp water and cook covered for 3-4 minutes or till the apples are cooked and water evaporates.
Cool slightly. Add in the Dulche de Leche, mix well.
Refrigerate for half an hour.
Pinch off 7-8 balls from the dough. Flatten the ball into a disc.
Roll out the ball a little. Add a tablespoon and half of the stuffing in the centre.
Bring together the edge and Seal it, like you would for a stuffed paratha.
Dust the work surface with a little flour.
Gently Roll out into a ~4 ½ inch disc, taking care that the filling does not come out. Don’t make them very thin.
Cook on medium heat on a hot griddle on both sides, till light brown spots appear.
Repeat this process to make the rest of the Satoris.
These can be cooled and kept in an airtight container at this stage.
When ready to serve, heat them on the griddle, drizzle homemade ghee liberally on both sides and serve.
Share this:

Spicy Crepe Packets
These Crepe Packets have been on my mind for quite some time. I had seen crepe packets with a fish filling (I think) on a food show on TV some time back. I forgot to note down the recipe and also forgot where I saw it, but the idea kept hovering in my head.

There is an ever hungry lad in my house who, sometimes, needs to be fed every hour! The little lady on the other hand is very very choosy. Finding a balance between their diverse tastes and wants is quite a challenge. One rainy afternoon (yesterday actually 🙂 ) when the kids had a holiday, they pestered me to make something ‘nice & tasty’ and so the crepe packets were made! I am happy to report that these Spicy Crepe Packets got a thumbs up from both of them and both of them thought they were ‘nice & tasty’.

Since I did not remember the recipe I saw, I used a basic crepe recipe. Mushrooms & Corn are loved by the kids in any form. So they went into the filling. The veggies were flavoured with a Cajun spice mix and fresh Oregano from our garden. But as you will see from the recipe, pretty much any seasoning or masala mix or for that matter any filling of your choice should be ok. The lad had the Crepe packets with Sriracha Sauce while the little lady preferred it with Tomato sauce. I thought they were good on their own too.
The crepe packets were accompanied by a glass of Hot Chocolate (made with a Homemade Hot chocolate mix) and the awesome weather !
Participating in food events provides the much needed motivation for me to blog regularly or I just keep posting photographs on My Foodcourt’s FB page or Twitter or Instagram ( If you are not already following me, please do so now 🙂 Thank you)

These Spicy Crepe Packets is my second entry to the Monsoon Snack Recipe Challenge @ The Hub hosted by Archana’s Kitchen
Thanks Archana, the Hub is providing the much needed blogging motivation for me 🙂
Here’s the recipe for Spicy Crepe Packets
Makes ~ 8-9 Crepe packets
Ingredients
For the crepes
½ cup Plain Flour/Maida
¼ Cup Whole wheat Flour
¼ Cup Oat Flour (Ground Instant Oats)
1 Tbsp melted butter or Ghee
2 eggs
½ tsp salt
½ cup milk
~ ¾ cup water (more or less to get a thin consistency batter)
Pinch of baking powder (optional)
For the filling
1 packet button Mushrooms cleaned, stems removed and finely chopped (~ 1 cup chopped mushrooms)
¼ cup Sweet Corn Kernels
1 Onion finely chopped
1 small Bell pepper finely chopped (Red/Yellow or both)
2 Cloves Garlic
2 tsp Cajun Spice mix (I used Spice Supreme)
½ tsp Chilli Flakes
Salt to taste
Grated Cheese as required
Few Fresh or dried Oregano leaves
2 tsp Oil
½ egg for brushing and sealing the crepe packets
3-4 tbsp Ghee or butter for frying the packets
Method
For the filling
Heat Oil in a pan.
Add the Garlic and onion and sauté for few minutes.
Add the corn and cook covered for 4-5 minutes
Add the mushrooms and cook on high flame till the water evaporates (2-3 minutes).
Add the bell peppers and cook 1-2 minutes more.
Add the spice mix, salt, chilli flakes and oregano leaves.
Mix well and keep aside.
For the crepes
Sift the flours, salt and baking powder together.
Blend all the ingredients together in a blender or by hand .The consistency of the batter should be thin. Add more water if required. Sieve to remove any lumps.
Keep the batter aside for ½ hr to 45 mins.
Heat a nonstick pan.
Pour a ladleful of batter and swirl the pan immediately to spread the batter evenly. (I used a 6” non stick pan)
Cook for 30-40 seconds or brown spots just appear on the bottom
Take it out the crepe and place it on a flat surface.
Repeat the procedure for more crepes
To make the crepe packets
Place a crepe, cooked side up on a flat surface.
Place about 1 tbsp filling in the centre. Grate some cheese over it.
Fold 1 side of the crepe over the filling and brush with egg.
Fold the other side and brush again with egg.
Fold the ends to make a packet and press slightly to seal.
Brush with egg on the folded side as well as the other side.
Heat 1 tbsp butter or ghee in the same non stick pan and place the crepe packets, folded side down .
Fry on both sides till brown.
Repeat for other packets.
Serve Hot immediately with Sauce or Chutney of choice.
Share this:

9 years and counting!
9 Years! That’s how old My Foodcourt is 🙂
What started as a journal to document heirloom recipes, soon became a passion and now an integral part of my life. Exploring different cuisines,Learning food photography,Cook-alongs,Bake-alongs, food events, Giveaways,some media mentions,blogging Off and On (at my own pace 🙂 ), moving to another space and then moving back – all this happened during these 9 long years.

I have said this before and will say it again- I have been very lucky to meet talented, generous and ever encouraging virtual friends during these years, who now are my friends for life. Some of them I have met in person too. Thank You my food blogger friends as well as readers of My Foodcourt. I am so glad we crossed paths!

Many of my food blogger friends have stopped blogging now. I miss the camaraderie we enjoyed back then, since we were such a close knit group. Not that it doesn’t exist anymore, but the small food blogging group has now become an ocean and it is a pretty difficult to keep up with the happenings.
I also miss posts from my friend Indira of Mahanandi very much. Mahanandi, as I have said earlier was the inspiration to start this blog in the first place. I am so glad that I met Indira few years back when I visited Sugarland. I wish and hope she gets back to blogging soon!

On that Nostalgic note, I would like to share a recipe for a Banana and Date loaf to celebrate these glorious 9 years of my virtual life .
The original recipe is from Lisa’s Lemoy Kitchen . I made a few changes to it. I used part whole wheat and part APF/Maida instead of the spelt flour. Also I reduced the sugar to less that half cup, since I thought 1 cup sugar was too sweet. Also I skipped the pecans,since the little Diva in our house does not like nuts 🙂

I baked 6 mini Banana and Date loaves instead of 1 large loaf and they were gone in no time. This is a great way to use up overripe Bananas.
Here’s the recipe for the Banana and Date loaf
Adapted from Lisa’s Lemoy Kitchen
Makes 6 mini loaves
Ingredients
1 cup All purpose flour(Maida) + ½ cup whole wheat flour
1 teaspoon Baking soda
1 teaspoon salt
200g pitted dates (roughly chopped)
½ cup caster sugar or a little less
2 eggs
½ cup vegetable oil
3 very large ripe bananas (mashed)
1 1/2 teaspoons of vanilla extract
Method
Preheat oven to 180 degC.
Grease and dust the loaf pan or mini pans.
Sift flour and baking soda into a mixing bowl.
Add salt and dates.
Mix to thoroughly coat the nuts and dates.
Use electric mixer, whisk the eggs, sugar and oil until light and creamy.
Add mashed banana and vanilla extract.
Add dry ingredients into the banana batter.
Pour into the loaf/mini pans.
Bake for 50-60 minutes (large pan) or ~15-18 minutes for the mini loaf pans or until skewers comes out clean.

Share this:

Desi Health Bites- Multigrain Daliya Hot Pot
I am back with another recipe showcasing my love for multi-grains again for the #Fortunehealthbites – Multigrain Daliya Hot Pot . It’s a Hot Pot alright – but a quick, no meat and no bake kind of Hot Pot- unlike the ‘Lancashire Hot Pot’ which inspired me for the basic idea and presentation for this recipe.
Daliya or the broken grains/Lapsi of wheat is the most commonly used in Indian cuisine for making savoury as well as sweet preparations. Jowar and Bajra groats are traditionally used to make ‘Khichada’, a spicy version of the Khichdi.
With the appearance of organic stores in town/online there is a now a variety of Daliyas easily available. My pantry now hosts an array of these nutritious, relatively quick to cook Daliyas .

I have flavoured this Hot Pot with Allspice, just because I have these flavourful leaves growing abundantly in my kitchen garden. The grilled sweet potato garnish adds some crunch to the Multigrain Hot Potmaking it look like a ‘gourmet’ makeover of the humble Khichdi, while still maintaining its ‘Comfort Food’ status.

I had recently switched over from Sunflower to Ricebran oil as per suggestion from my all knowing elder brother 🙂 and then as if on cue, Fortune Foods sent over their Rice Bran Health oil.
Fortune rice bran health oil has a key micronutrient called “oryzanol”, an antioxidant found only in the bran of rice. It helps reduce bad cholesterol,increase good cholesterol and keeps your heart healthy, making it a healthier choice.
Squalene is an organic compound naturally produced by human skin cells and is a natural moisturizer. Fortune Rice Bran Health Oil contains good amounts of it which prevent the ageing of skin.
Antioxidants improve health by fighting free radicals that harm the immune system. Fortune Rice Bran Health oil has natural antioxidants that help build strong immunity.”

“Also I learned that it is a myth that colourless or transparent oils are healthier than dark oils. FRBH is refined optimally to keep all the essential micronutrients intact. It has a darker appearance primarily due to Oryzanol.
It is a myth that colourless or transparent oils are healthier than dark oils. FRBH is refined optimally to keep all the essential micronutrients intact. It has a darker appearance primarily due to Oryzanol.
It is enriched with a gamut of nutrients and is good for heart, immunity, skin and hormones. It is appropriate for people of all ages”
Here’s the recipe for my recipe for the Multigrain Daliya Hot Pot
Multigrain Daliya Hot Pot
Serves 4-5
Ingredients
1 ¾ Cups mixed Daliya (Broken :wheat,jowar,barley,Buckwheat,corn,rice- any or all of these)
¼ cup green moong dal
¾ cup chopped veggies ( Beans,carrots,peas,beetroot,beetgreens,red pumpkin etc..)
1 small onion finely chopped
1 small Tomato chopped
½ tsp grated ginger
2-3 garlic pods crushed (optional)
1-2 Allspice leaves of Bay leaves
Handful of mint leaves torn into pieces or you can use coriander leaves
5-6 cups of vegetable stock/water (for porridge like consistency)
Salt to taste
For the tempering
3 tsp Fortune Rice bran Health oil
2 tsp cumene seeds
2 tsp mustard seeds
½ tsp turmeric powder
½ sp Asafoetida
3-4 dried red chillies torn into pieces
2-3 tbsp peanuts (optional)
For the Hot Pot Topping
2 large Sweet Potatoes sliced
½ tsp crushed black pepper
1 tsp Rock Salt or to taste
7-8 mint leaves torn into pieces
2 tsp Fortune Rice bran Health oil
Juice of ½ a lime
Method
In a bowl Mix the crushed black pepper,rock salt,lime juice,mint leaves & oil.
Pour over the sliced sweet potatoes and rub all over.Keep aside.
Wash the Multigrain Daliya and the green moong dal with water.
In a pressure pan, heat the oil.
Add the mustard seeds and once they crackle add the cumene seeds.
Add the turmeric powder,asafoetida,dry red chillies and peanuts .Stir for minute.
Now add the Allspice/bayleaf and the chopped onion, crushed garlic and grated ginger. Sauté for a minute.
Add the chopped tomato and cook for a few seconds.
Add the veggies next and mix well.
Now add the multigrain Daliya along with the green moong dal. Mix again.
Add ~ 5-6 cups of Vegetable stock or water (for porridge like consistency).
Add salt.Cover and cook for 1 whistle+10-12 mins on SIM or till the Daliya is cooked.
Meanwhile, grill the Sweet potatoes on a griddle pan on the stove top or in the oven ~ 10 minutes on each side- till they are just cooked.
Take out the Hot Multigrain Daliya in a flat bottom serving bowl.
Garnish with the mint leaves.
Top all over with the grilled sweet potatoes and serve hot immediately.
Pomegranate + green onion Raita and roasted Nagli/Ragi papad make great accompaniments for the Multigrain Daliya Hot Pot.

Notes:
If you have the time, soak the mix Daliya and the green moong dal in water for about half an hour. This can reduce the cooking time.
The veggies can be chopped in advance and refrigerated in airtight containers.
Fresh Basil is also a good option as a garnish for the Hot pot instead of Mint or coriander.
This blogpost is in association with Fortune Foods as a part of their Desi Health Bites activity– The Hunt for the Best Rice Bran Oil Recipes. For more updates and healthy recipes using Fortune Rice Bran Health Oil, follow Fortune Foods on Facebook and on Twitter at @fortunefoods
Check out more Desi Health Bites by all the awesome Food Bloggers here at Fortune Food
Share this:

Desi Health Bites – Mini Thalipeeth Tostadas
I love experimenting with different grains and flours. Jowar, Nagli/Ragi,Amaranth, Corn etc.. are pantry staples in my house. Most of the times,I use a blend of these grains for our day-to-day food in the form of khichdis, upmas,dosas.
One such multipurpose, wholesome flour mix is the ‘Thalipeeth Bhajani. This is a pantry staple in every Maharashtrian household.

Bhajani Thalipeeth basically is a quick flat bread made using this multigrain Bhajani mix along with chopped onions,sometimes some chopped fresh or leftover vegetables, fresh coriander, sesame seeds and spices.It is usually served for breakfast with fresh homemade Curd/Yogurt, homemade white butter and/or sweet lime pickle.

My Mom makes her own Thalipeeth Bhajani by roasting – Jowar, Bajra, wheat, Nagli,Rice,Gram dal,Urad dal and cumene , coriander seeds and then milling them together. Needless to say I get my Thalipeeth Bhajani mix readymade from her as and when I am out of stock :). Most supermarkets, grocery stores, health food shops now stock Thalipeeth flour, so it is easily available or see the Quick Mix version given below.
Another favourite item from the Maharashtrian cuisine is ‘Khamang Kakdi’ – cucumber salad tempered with spices and topped with crushed peanuts. I love to add Tomatoes and onion to my Khamang Kakdi.

Both these Classic Maharashtrian favourites, I have combined in a quick modern Appetizer Avatar- Mini Thalipeeth Tostadas, akin to the Mexican Tostadas.

It seems to be a long winded recipe but it uses simple day-to-day ingredients found in most Indian kitchens.With some advance preparation it can be easily put together in under 30 minutes.
I have used Fortune Rice Bran Health Oil for making my Mini Thalipeeth Tostadas.
“Fortune rice bran health oil has a key micronutrient called “oryzanol”, an antioxidant found only in the bran of rice. It helps reduce bad cholesterol,increase good cholesterol and keeps your heart healthy, making it a healthier choice.
Squalene is an organic compound naturally produced by human skin cells and is a natural moisturizer. Fortune Rice Bran Health Oil contains good amounts of it which prevent the ageing of skin.
Antioxidants improve health by fighting free radicals that harm the immune system. Fortune Rice Bran Health oil has natural antioxidants that help build strong immunity”.
“It is a myth that colourless or transparent oils are healthier than dark oils. FRBH is refined optimally to keep all the essential micronutrients intact. It has a darker appearance primarily due to Oryzanol.
It is enriched with a gamut of nutrients and is good for heart, immunity, skin and hormones. It is appropriate for people of all ages”
 Here’s the recipe for my Mini Thalipeeth Tostadas
Mini Thalipeeth Tostadas
Makes about 18-19, 3” round Tostadas
Prep time: 20 mins
Cooking time: ~30 mins including baking time
Ingredients
For the Tostados
2 Cups Thalipeeth flour/Multigrain flour *
1 tsp Ajwain/Carom seeds
2 tsp Sesame seeds
½ tsp Dry red chilli powder (or to taste)
2 tsp Fortune Rice Bran Health Oil
2 Tbsp chopped fresh coriander leaves
¼ tsp garlic paste
½ tsp Asafoetida/hing
Warm water as required (~ ¾-1 cup)
For the topping
1 large cucumber peeled finely chopped
1 large Tomato ,seeds removed & finely chopped
½ onion finely chopped
3 tsp roasted peanuts crushed
2 tsp chopped fresh coriander leaves
½ tsp brown sugar
Salt to taste
For tempering
2 tsp Fortune Rice Bran Health Oil
½ tsp mustard seeds
½ tsp Cumene seeds
5-6 Curry leaves
½ tsp powdered Asafoetida
1-2 green chillies chopped
For the herbed Yogurt/Curd
¾ cup thick Yogurt/curd
2 tsp chopped mint leaves
2 tsp chopped coriander leaves
Rock salt to taste
Method
For the Tostados
Preheat the oven to 170 deg C.
Line a baking sheet with Parchment paper.
Add the flour or flours to a mixing bowl.
Add all the other ingredients except the water.Mix well.
Slowly add the warm water and knead the flours into a stiff but pliable dough.
Transfer the dough to a lightly floured work surface.
Roll out into a thin layer. The layer should be as thin as possible while still workable.
Cut rounds using a 3” cookie cutter/ sharp edge of a small steel Dabba.
Transfer to the prepared baking sheet and bake till they turn golden around the edges – ~15-20 minutes. (Keep an eye on them after about 12 minutes as they burn easily.)
Cool completely on a wire rack.
Note: These can be made well in advance. Can be stored in an air tight container for about 2 weeks.
For the topping-Koshimbir
Mix the cucumber, tomatoes, onions in a bowl.
Add the crushed peanuts, salt,sugar and mix
In a small Kadhai/pan add the oil.
Once hot, add the mustard seeds.
Once the mustard seeds crackle, add the cumene seeds, Asafoetida, curry leaves and green chillies.
Pour this over the Cucumber-tomato-onion mixture in the bowl.
Add the chopped coriander and mix again.
Note: The veggies can be chopped in advance but mix everything just before serving and use immediately
For the Herbed Yogurt/Curd
In a small bowl mix together the Yogurt and the herbs.
Season with Rock salt and mix well.
To Assemble the Mini Thalipeeth Tostadas
Keep the crispy Thalipeeth Tostadas on a large serving plate.
Add 1½- 2 spoonfuls of the Koshimbir Topping.
Top with a dollop of the herbed Yogurt
Serve immediately
Other serving suggestions:
You can use Sweet Lime pickle along with the juice, or a coriander-mint chutney or the Marathi Red/Green Chilly Thecha instead of the herbed Yogurt

*Make your own multigrain Quick Thalipeeth flour mix: ½ cup Wheat flour+ ¼ cup Rice flour+ ¼ cup Ragi/Nagli flour+ ¼ cup Jowar flour+1/4 cup Bajra flour+ ¼ Besan/chickpea/Gram flour+ ¼ cup Urad Dal/Black lentil flour + ½ tsp roasted cumene powder+ ½ tsp coriander seed powder
This blogpost is in association with Fortune Foods as a part of their Desi Health Bites activity– The Hunt for the Best Rice Bran Oil Recipes. For more updates and healthy recipes using Fortune Rice Bran Health Oil, follow Fortune Foods on Facebook and on Twitter at @fortunefoods
Share this:

Kid Friendly, Quick,Easy Snack- Corn & Sweet Potato Tikkis
My kids need to carry breakfast once a month to the school for their ‘Sharing Day’. Breakfast otherwise is provided by the school. Variety of Appe, sandwiches, pancakes have been the norm for the past months. This time the lad wanted something different. Since Sweet corn is a permanent resident in my refrigerator, we made these quick Corn & Sweet Potato Tikkis.

Our Dabbas got colorful this Holi! (That is as much as I celebrate the festival 🙂 ). These gorgeous beauties are from The Chalk Boutique. A colorful makeover of the traditional tiffin, these Dabbas are a welcome change from the Tupperwares and lock-n-locks (though they have their advantages :))

The Corn tikkis are quick and quite simple to make. Boiled corn, Sweet Potatoes, Breadcrumbs, cheese ,a few herbs /spices and you have a kid friendly snack ready in minutes.

Here’s the recipe:
Corn & Sweet Potato Tikki
Makes ~ 12-13 bite sized tikkis
Ingredients
3/4 cup Boiled Sweet Corn kernels,drained completely
2 slices Multigrain bread
2 small Sweet Potatoes boiled,peeled and mashed
½ tsp Ginger garlic paste
½ Onion finely chopped
2-3 Tbsp grated Cheddar Cheese
½ tsp Turmeric Powder
2 tsp dried or fresh Mixed herbs
2 Tbsp Corn Flour
Chilli flakes/Chilli powder/crushed black pepper to taste
Salt to Taste
~ 3-4 tbsp Oil for greasing the pan and to Saute the onions
Method
In the bowl of the food processor pulse together boiled corn and the bread slices to a coarse crumbly mixture.
Sauté the chopped onion in 1 tsp oil.
Add the ginger garlic paste and the turmeric powder.
Sauté for a minute more and cool.
Add the onions to the corn mixture and pulse once or twice .
Take this mixture in a mixing bowl. Add the mashed sweet potatoes, herbs, cheese, salt,Corn flour, chilli flakes/crushed Black pepper.
Mix together and form about 12-13 small balls of the mixture. Flatten these to make a small disk/tikki shape.
Grease a griddle pan with oil and grill the Corn Tikkis till lightly browned on both sides.
Serve hot with Tomato Ketchup, Imli Chutney or any chutney of your choice
(The lad took these to school and said they were just as good cold too)
Share this:

Soulfull 8 years!
The blog officially turned 8 this August! Still on a high after attending the first ever Indian Food bloggers meet, I almost forgot that it’s been 8 long years since the Food blogging bug first bit me! I can still vividly remember the day, long long ago when I discovered this wonderland through the gorgeous Mahanandi.

This gastronomic journey, more than anything else, has been such a precious learning experience for me. On my way I have also discovered my passion for baking and a whole new world of Food photography. Reading, learning and imbibing everything shared by all the talented, generous and ever encouraging Food bloggers has enriched my culinary life and opened up many new avenues for me. So a big Thank you to all my Food blogger friends, for being so inspirational and encouraging throughout this ride.
A huge THANK YOU to all the readers of My Foodcourt. To those who have stuck around for a long long time- posts or no posts. Thank you to all the new readers and to those whose comments & message are ever so encouraging. To those who check on me when the blog is silent for long- everyone Thank you very much.
And now to today’s Soulfull post. Of the cart load of Goodies we received at the #IFBM2014, the one from Soulfull was tried, tasted and over as soon as I returned back. I had heard great reviews about Soulfull from Food blogger friends, mostly on Twitter. This got attested when the fussy daughter finished the Soulfull Choco fills-Nagli bites without any fuss and was asking for more. I immediately checked with them if they deliver products in Nasik and to my delight they do! The son loved the Granola bars and I did not get even a glimpse of the bars.
The Adai mix packet at the outset did not receive such a warm response. The fussy one declared- not another dosa. I promised her, no dosa.

Both kids love Appe – dosa + veggies in a cuter Avatar. The Appe pan/ Aebleskiver pan is currently my favourite pan to use. The kids love their ‘Pancake appe’ made with the Appe pan. The Adai mix, instead of being served as a plain old dosa was dressed up with some veggies and served as cute little cocktail bites. I made an Indian version of the Chimichurri sauce- a Cilantro mint Chimichurri sauce, which was relished with the Veg Adai Appe.

From no more Dosa to more ‘Cocktail Adai Appe’ pls,the Soulfull Adai mix was a hit with the kids. I particularly liked the predominant flavor of Asafoetida in theAdai mix.
This is one of those dishes that has to be served and savoured as soon as it is made. A perfect rainy weather snack- here’s the recipe for Cocktail Adai

Cocktail Adai with Soulfull Adai mix Recipe:
Makes~ 10-12 Appe
Ingredients:
1 cup Soulful Adai mix
½ cup homemade buttermilk
1 cup water to make a thick batter (or as needed)
2 tsp fine semolina/Rava
A handful of (total)veggies (I added Sweetcorn, chopped onion,chopped Spinach and grated carrot)
1 tsp chopped coriander
Oil for drizzling
Method
Mix the Adai mix,Rava, buttermilk and water and keep aside for half an hour.
Mix in the veggies.
Heat a Appe pan/ Aebleskiver pan ( I use a non-stick one)
Drizzle oil in the cavities.
Drop spoonful of the batter in the Cavities.
Cover and cook on low flame for 3-4 minutes or till the bottom is golden brown.
Use a wooden skewer to turn each Appe and cook on the other side for 1-2 minutes.
Serve immediately.
Cilantro-Mint Chimichurri Sauce recipe
Makes~ 1 ½ cups
Ingredients
1 cup firmly packed fresh Cilantro/Coriander
¼ cup mint leaves
3-4 garlic cloves
½ small onion chopped (~2 tbsp)
1 Tbsp lime juice
1 Tbsp wine Vinegar
¼ cup olive oil
½ tsp Crushed black pepper/ Red chilli flakes
Salt to taste
Method
Pulse together the onion, garlic in the blender/food processor.
Add the Cilantro and mint leaves and pulse till just crushed
Take out the mixture in a bowl and add the rest of the ingredients and mix.
Refrigerate if not using immediately.


