Posts filed under ‘toor dal’
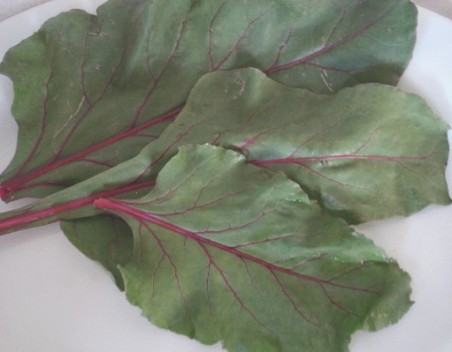
All things Beet
Previously I would buy only the Beet-root without the greens. After seeing Asha’s Dal saag recipe, I was inspired to buy Beet greens along with the Beetroot. Thanks Asha for the inspiration.
I have made my own version of the dal.I have used the Beet greens along with three types of dals; Chana Dal, Mung Dal and Toovar dal to make this very healthy and delicious Beet greens dal.
I used some of the leaves to make paratha for my little one J
The pink-red stems of the Beet greens were looking so fresh and lovely that I didn’t have a heart to throw them away, which I later realized was a very wise decision! I made a delicious and refreshing Raita with them, which complimented the Dal-Rice combination.
I made Beetroot Kanji with the Root.
After making the Dal and Raita, I had a sense of satisfaction –that of utilizing most of the parts of the Beet, not wasting much (except the beetroot peels). J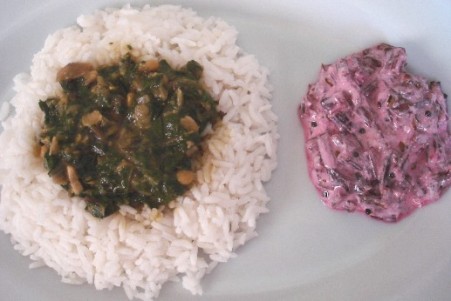
__________________________________________________________
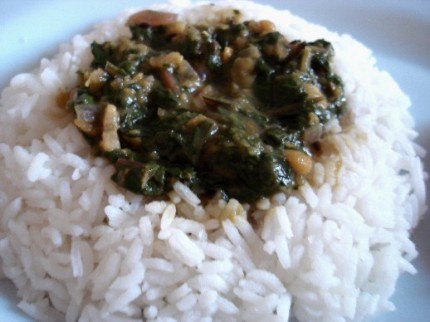
Beet greens Dal recipe
Servings :4-5 _____________________________________________________
Ingredients:
1 ½ cup chopped Beet greens
½ cup Chana Dal
½ cup Moong da
l½ cup Toovar Dal
1 onion chopped
4-5 green chillies chopped
5-6 garlic cloves peeled and finely chopped
½ tsp cumene seeds ½ tsp mustard seeds¼ tsp turmeric powder
2 tsp oil
Wash the dals , add water, a pinch of turmeric powder and few drops of oil. This helps to cook the dals faster. Pressure cook till well done. Boil about 1 cup water in a vessel, add the beet greens and cook on a low flame till the greens are soft and well cooked.Add the cooked dals to these greens. Add salt and mix nicely.Heat oil in another pan. Add the cumene seeds, mustard seeds, garlic and chopped onion and fry nicely till the onion turns golden brown. Add the green chillies.To this add the Beet greens-dal mixture and cook for a few seconds more.
Serve hot with rice.
__________________________________________________________
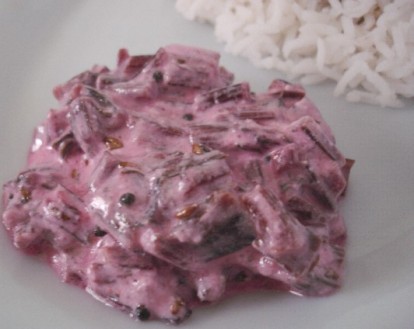
Beet stem raita recipe
Servings :about 2-3 __________________________________________________________
Wash the Beet stems thoroughly (I had about7-8 young stems). Peel the thin skin from the stems. Steam the stems. (I put it in the pressure cooker along with the rice and the dals)Cool and chop the stems. Add about ½ cup Curd/yoghurt to this, salt as per taste and about ¼ tsp sugar and mix nicely.In a small pan heat 2 tsp oil, add ½ tsp cumene seeds, ½ tsp mustard seeds, 2-3 chopped green chillies. Add this tadka to the yoghurt raita. Mix nicely and chill.Serve with roti or dal-rice or have it as it is.
_____________________________________________________
And that’s my little one’s paratha made with Beet greens!

Share this:

Ambadichi Bhaji (Sour greens curry)
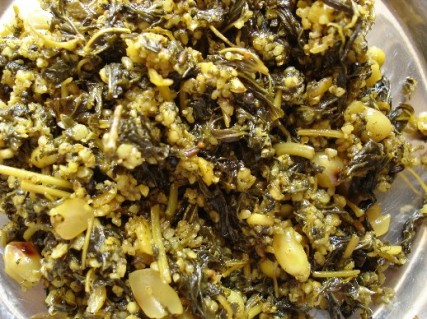
Ambadichi Bhaji (Sour greens curry)
Type Comfort in MS word, select it, right click and see the synonyms: Soothe , console, reassure, calm, relieve ..This Ambadichi Bhaji (Sour greens/Gongura curry) makes every synonym for comfort sound true:
½ Soothes your palette
½ Consoles you when you are feeling low
½ Reassures you when you dearly miss your mom’s cooking
½ Calms you down when you are upset
½ Relieves your stress
Yes this is one of the recipes I rely on when I am in need of some ‘Comfort food’ (of course provided the greens are available).

Ambadi/sour greens/Gongura leaves
Ambadi leaves are sour -almost vinegary to taste. But this tartness is what makes them so tasty and special. I read here that these greens come in two varieties- Red stemmed and Green stemmed. Here we usually get the green stemmed variety, so I have used that. What makes this a quintessentially Maharashtrian recipe is the use of Jowar Kani (broken Jowar grains). The Ambadi leaves are stemed together with the Jowar Kani to make this very special Ambadichi bhaji -which makes me nostalgic and reminds of my mom’s or my granny’s cooking each and everytime I make it.
__________________________________________________________
Ambadichi Bhaji
Servings :about 3-4
____________________________________________________
Ingredients:
1 big bunch Ambadi leaves (cleaned,washed and chopped)
1 cup Jowar (Sorghum/White millet) grains
2tbsp Toovar dal (arhar dal/yellow lentils), soaked in water for ½ hour
2tbsp Peanuts soaked in water for ½ hour
Salt as per taste
For the tadka:
8-10 garlic cloves peeled and crushed
2-3 tsp oil
½ tsp cumene seeds
½ tsp mustard seeds
1-2 tsp Red chilli powder (adjust to your taste)
To make the Jowar Kani:

Jowar Kani/Broken Jowar Grains
Coarsely grind the Jowar grains in the mixer for few seconds. Tranfer to a sieve (used to sieve atta or Maida). Remove the powder which falls at the bottom (this flour can be added to the usual jowar flour for making Bhakris, or add this to the usual Roti atta)Use the broken jowar kani which remains in the sieve to make Ambadichi Bhaji. If any unbroken jowar grains are left in the sieve, run them once again in the mixer and repeat the above procedure. Soak the Jowar Kani in water for ½ hour along with the Toovar dal and peanuts.
To make the Bhaji:
Steam the chopped Ambadi leaves and the soaked Toovar dal, Peanuts and Jowar Kani. For steaming I use a stainless steel sieve kept on a steamer-a deep vessel filled with 1/3 water. Alternatively you can use a pressure cooker without the whistle. Cover the sieve and steam till the leaves are well cooked (takes about half an hour)
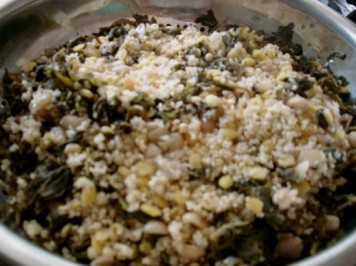
Ambadi leaves,soaked Jowar Kani,Toovar dal and peanuts in SS sieve for steaming
Remove the bhaji from steam,add salt and mix nicely. In a small pan heat oil ,add the mustard seeds, then the cumene seeds,then the crushed garlic. Fry nicely till your kitchen smells of the garlic, switch off the gas ,add the chilli powder and immediately pour this tadka on the bhaji so that the red chilli powder does not get charred.Mix nicely and serve with Bhakri or Roti!
Share this:

Varan Phala- (Wheat flour dumplings cooked in yellow lentil curry)
Varan Phala (Chakolya is another Marathi name) the mere mention of this name is enough to sensitize my taste buds. A one pot wholesome meal, this recipe is commonly made in many households. Wheat flour dumplings are cooked in dal which in turn is flavoured with masalas making it sweet,sour and spicy!
So here’s Varan Phala ,from Maharashtra-The land of the great Maratha Warriors, for Indira’s wonderful Food Parade on Independence Day

Serves 4
Ingredients:
For the Dal(Lentil curry)
1 cup Toor dal (Arhar dal,Yellow lentils)
2’ piece dried coconut and 2 tsp cumene seeds coarsely ground together
8-10 pieces dry Kokum
1 tbsp crushed jaggery
1tsp Maharashtrian kala Masala
1 tsp dry red chilly powder
1 tsp mustard seeds
½ tsp turmeric powder
2 tsp oil
Salt as per taste
For the Wheat flour Dumplings
1 cup Whole wheat flour (Atta)
½ tsp turmeric powder
½ tsp dry red chilly powder
½ tsp salt
Method:
For the Dal(curry): Pressure cook the Toor dal with 2 ½ cups water , ½ tsp turmeric powder and few drops oil. Turmeric and oil drops help the dal cook faster.
In a pan heat 2 tsp oil.Add the mustard seeds.Once they crackle add the coconut – cumene mixture.Add the cooked dal .Add the chilli powder, kala Masala , jaggery ,Kokum and salt.Let it boil for some time
For the Wheat flour dumplings:Mix all ingredients for the wheat flour dumplings and knead it into a soft pliable dough.
Divide the dough into two balls. Roll out each ball on a flat surface into a thin big circle. Use dry wheat flour for dusting if required.
Cut the rolled circle into small squares with a knife.

Drop the squares in the boiling dal one by one.Boil for 12-15 minutes after all the squares have been dropped.
Serve hot.
Varan Phala tastes best when eaten hot.You can add a tsp of ghee to enhance the flavour.With a spoon or hand take a square along with some curry and eat..hmmm..yummy…
Veggies like beans or carrots can be added to the dal for variation.
Thanks Indira for such an innovative and wonderful idea.
Share this:

Shepuchi Bhaji (Dill leaves curry)
Shepu leaves (also called as Sowa or Dill) are easily available in most parts of India all through the year.
The soft, feathery leaves are a rich source of iron and are added to flavour many recipes. A very popular vegetable in Maharshtra, Shepu is cooked in different styles in different parts of Maharashtra.When served with Jowar Bhakri ( bread made from Jowar/sorghum flour- will post the recipe soon) it tastes blissful.This is my mom’s recipe for Shepuchi Bhaji:

Shepuchi Bhaji (Dill leaves curry)
Ingredients:
1 bunch Shepu(Dill) leaves, cleaned, washed and choppped.
3 tsp Toor dal (Arhar dal,Yellow lentils) soaked in water for 30 mins
1 tbsp besan (split gram flour)
½ tbsp coarsely ground roasted peanuts
1tsp powdered jaggery
Salt to taste
For the tadka (tempering):
½ tsp mustard seeds
½ tsp Cumene seeds
3 green chillies slit lengthwise
4-5 garlic cloves peeled and crushed
¼ tsp turmeric powder
2tsp oil
Method:
Pressure cook Shepu leaves, Toor dal in 2 cups of water for 1 whistle. Heat oil in a kadai (wok).Add the mustard seeds. Once the mustard seeds crackle, add the cumene seeds Add the crushed garlic and fry for 1 minute. Add the slit green chillies and again fry for a minute. Now add the cooked Shepu leaves with the toor dal. Cook for a few minutes. Add the peanut powder, jaggery and salt. Stir nicely. Once the mixture starts boiling sprinkle the besan flour and stir immediately. Cook for 5 more minutes (depending on the consistency of the curry required).Serve with Roti or Jowar Bhakri.

Shepuchi Bhaji (Dill leaves curry)served with Jowar Bhakri
Share this:


